Ever since I first saw a realistic hooked landscape, I have wanted to make my own. I had a photo in mind that I loved, but could I do it? The photo was taken in September of 2013 when my husband, Matt, and I were in Maine for the first time. I love lighthouses and we had a great time searching the Maine coast for the most famous ones. Bass Harbor Head Light was on my list since it is in Acadia National Park. It sits on a gorgeous rocky cliff and we enjoyed climbing around at the base looking for the best position for a photo. I had Matt stand near the water and I stood back to take his photo with the lighthouse in the shot too. A stranger came by and I asked him if he would take our photo together. He said yes, so I instructed him to stand right where I had been and showed him how to use my Nikon DSLR. He took one of us standing together and just for fun I said, “Will you please take another one?” Then I leaned over and gave my sweetie a kiss.
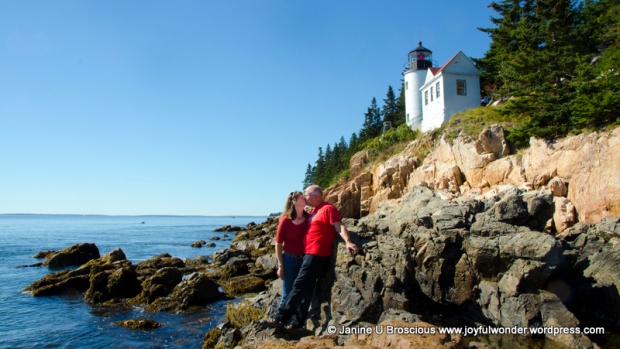
You see, for some reason, lighthouses are romantic to me. I’m not sure why that is. Is it because they are often in lonely, beautiful places by the water? Is it because the people who lived and worked there were serving others in such a selfless way? I’m sure actually living and working there wasn’t all that romantic but rather just plain difficult. But the photo that was captured in my camera was pure romance to me. This picture has not only a lighthouse, but also us showing our great love for each other.
I told myself that there was no way I could do this favorite photo justice with rug hooking. It had so many difficult aspects to it, rocks, sky, trees, building and PEOPLE! Oh, and water. I had hooked water once and even though it was good, I dearly wanted to improve upon it. Could I do it? Could I pull wool strips of fabric through linen, making loops, and have it look anything like the photo?
There was only one way to find out. So, I loaded the photo into Photoshop Elements and got busy. I really wanted Matt and me to be the focus of the piece so I enlarged us. I made the lighthouse bigger too. Then I removed the color and converted the photo into line art.
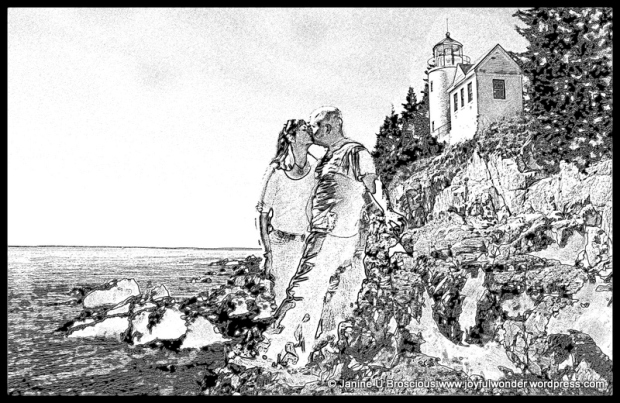
This was the pattern I came up with. I was at a bit of a loss as to how much detail to draw into the rocks and trees, but hoped I could figure that out as I went along. 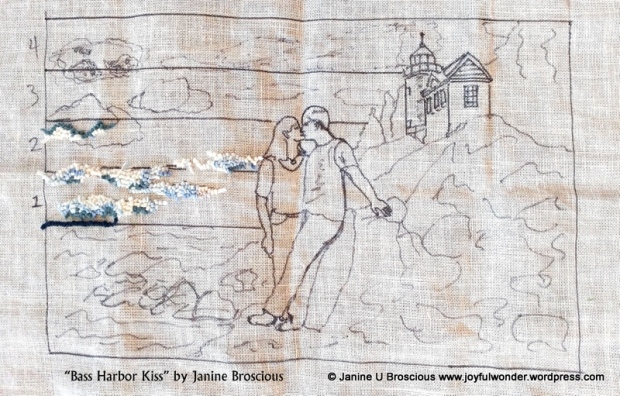
I had thought about this piece for over a year before I drew a pattern. In the meantime, I was studying others’ work and reading books on rug hooking. These two books proved to be invaluable, Pine Trees, Grass and Sky by Cindi Gay and Pictorial Hooked Rugs by Jane Halliwell Green.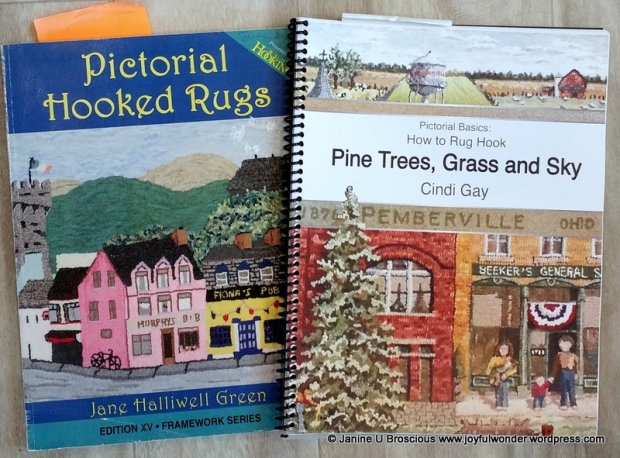
I decided to use the “sky” method that Cindi Gay describes in her book. She tells how to dye “sky” wool and an excellent method for hooking the sky. I ordered “sky” wool from Cindi Gay since I haven’t started dyeing my own yet. I jumped in and began hooking on my “make believe” sky. I just couldn’t hook the sky as it was in the photo, plain blue. So, I made up some clouds.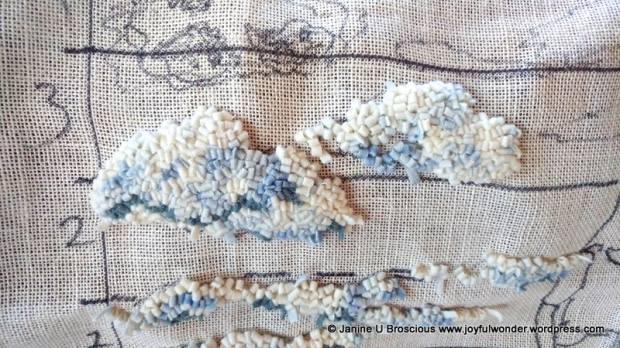
I found myself looking up in the sky a lot during this time. Clouds are really magnificent works of God’s art!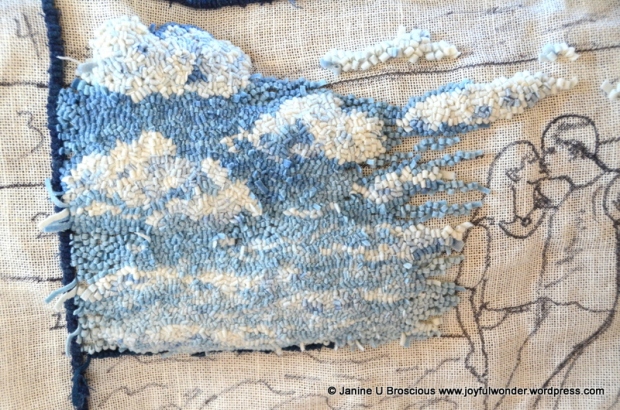
I got quite a bit of the sky finished and lost my gumption. I kept telling myself to keep “the people” for last so that it would keep me motivated. But the sky area was large and I was eager to do something else. Maybe I should do rocks next. Nope, just couldn’t get motivated. My lovely kiss piece sat in the closet for one and a half years. I figured I would probably never finish it, and that at least I had learned how to make a sky. But this past July I finished my dragonfly piece and needed a new project. Every once in awhile, Matt would say, “When are you going to finish Bass Harbor Kiss?” And wouldn’t you know, he brought it up again. “You really want me to finish that, don’t you?” I asked. He nodded with a big smile. How do I say no to that? So, even though I was totally intimidated by the piece, I decided to give it a go again. I pulled it out of the closet, and again, just couldn’t make myself do the rocks. I just kept feeling like I wanted to try hooking the people. I told myself to just give it a go and jumped in again.
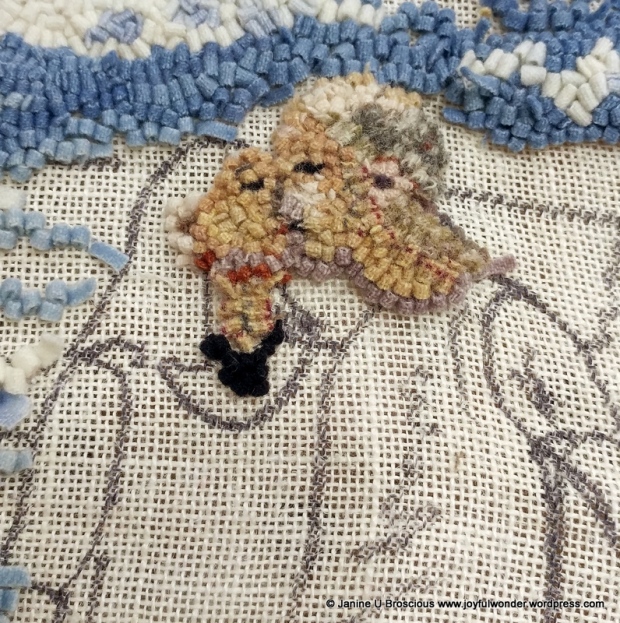
I didn’t have many flesh tones, so I just used what I had. It wasn’t quite what I wanted, and I didn’t think it looked like us, but it wasn’t too bad! It was good enough that it spurred me on. I was excited to be working on this special piece again. Every stage of it was scary. Could I hook clothes that didn’t look like blocks of blobby color? I worked on my shirt, looking at the photo constantly and trying to notice the highlights and shadows of the wrinkles in the fabric.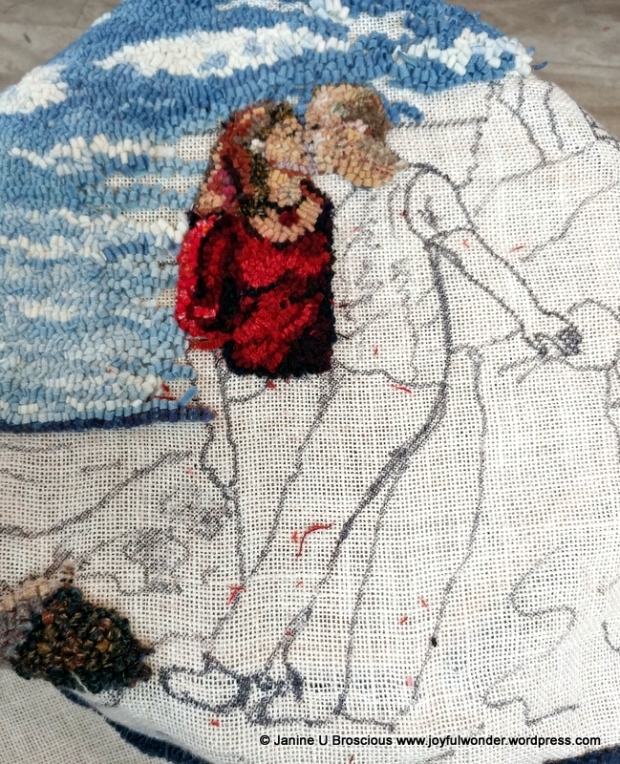
Working on the clothes became addicting. i just wanted to get those people dressed! I was glad we just happened to be in nice red shirts. But could I make them not blend together? And the jeans, how would I make them look like separate legs? Somehow, it worked, whatever I did! And I kept tweaking the faces.
I had no idea how to make hiking boots, so I hooked some water and more rocks while I contemplated them. I remember when I first drew this pattern, I was in Florida and looking for wool for it. A woman who lives in Maine looked at the turquoise wool I was holding and said, “Maine ocean water doesn’t look like that!” It had been quite a few years since we were in Maine and I just couldn’t remember how it looked. And my camera tends to make photos look overly blue so I didn’t trust my photo. Thankfully, we stopped in Maine on our way to Nova Scotia just a few weeks before and I had studied the water, and the seaweed covered rocks in the water.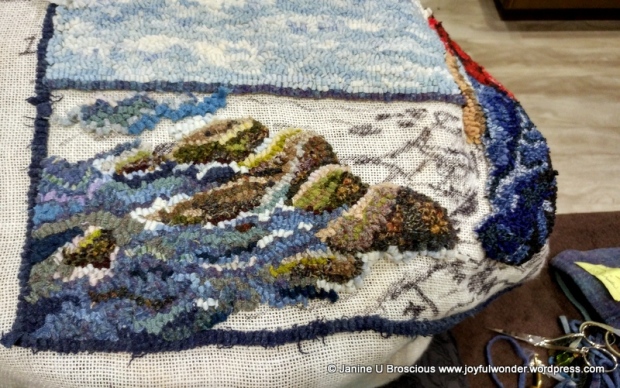
I enjoyed using many different colors in those rocks and water. Then I decided to tackle the boots. I enlarged just that area of the photo and gave it a go. It is amazing how just a highlight here and there will make our eyes see certain things. Here is the evolution of the boots.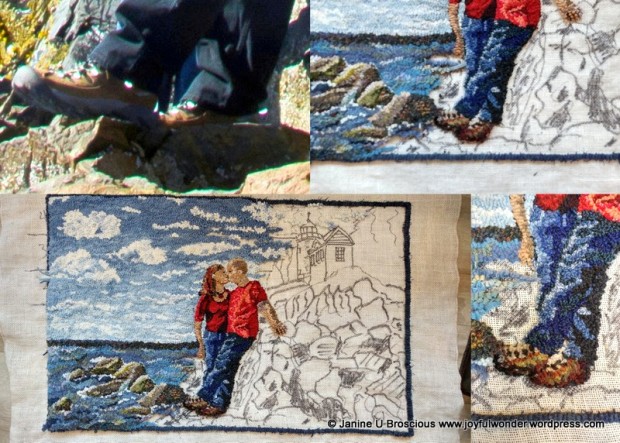
Next was the dreaded rocky cliff. Here is a photo of rock wool worms.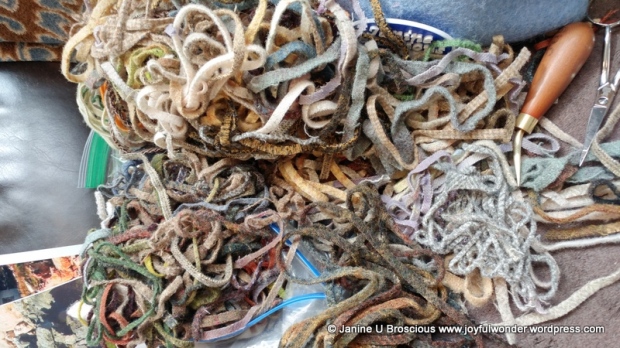
I really liked using a mixture of textured wools for the rocks. A piece of advice that helped was to “hook one rock at a time.” If I looked at the whole cliff, my mind was overwhelmed and I wasn’t sure what to do. But if I considered one rock at a time, then I could hook shadows, highlights and mid tones and a rock would pop into place like magic.
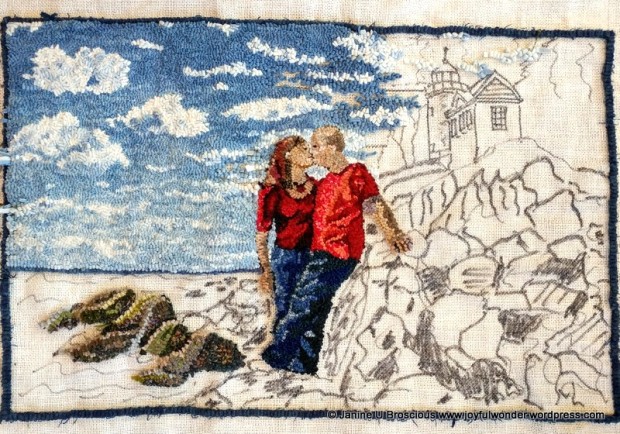
Next was the fun of doing the lighthouse. Again, this was something new for me. I always joke that straight lines and I do not get along. In fact, I avoid most things that have to be exact. I found it a fun challenge to try making the tower appear round. 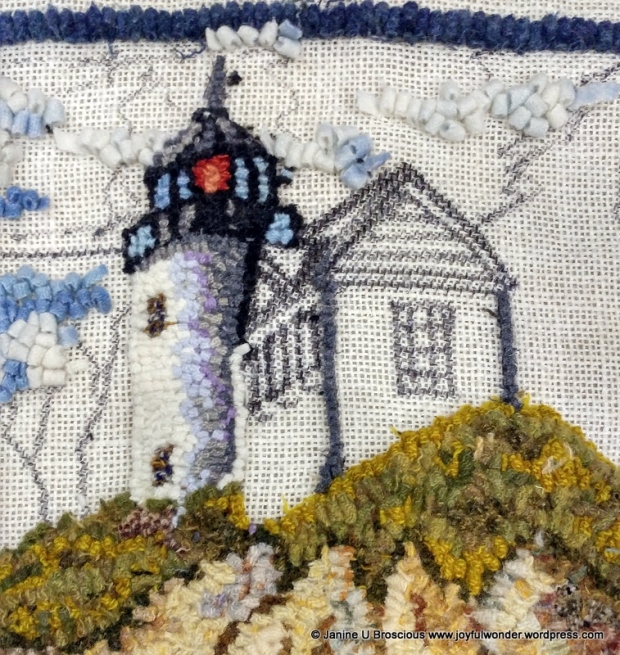
And trees. I hadn’t hooked them before either. I was attempting to hook several trees with some in front and others behind. Not sure it ended up looking like that, but what I hooked does look like trees!
I now had the whole piece hooked. But I was tempted to fiddle with the faces. Several people told me they were good and I should just leave them alone, including my Sweetie Pie. But, they just didn’t settle with me. I thought what I had hooked gave the impression of me somehow, but it looked like I was kissing some other guy. I couldn’t have that! While at Sauder Village, I picked up a packet of flesh tones from one of the vendors. Could I do a better job on the tiny faces that are only about 1 inch square each? I had to try.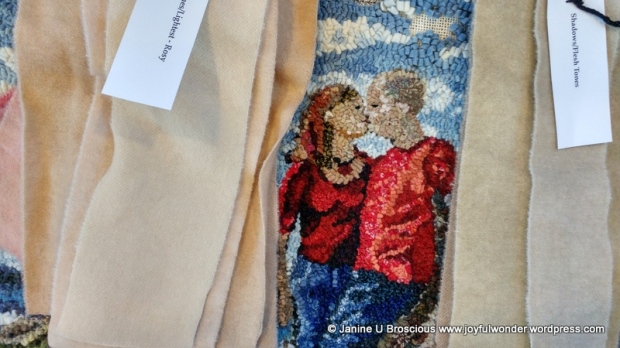
I enlarged the part of the photo with just us kissing. There were a few details and lots of shadows. It was difficult to know what to include. 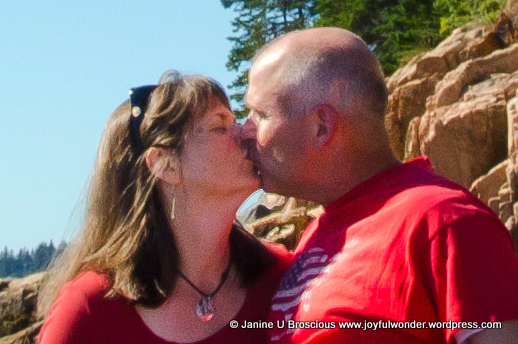
I drew a line drawing of us that helped me to figure out which details I needed to include.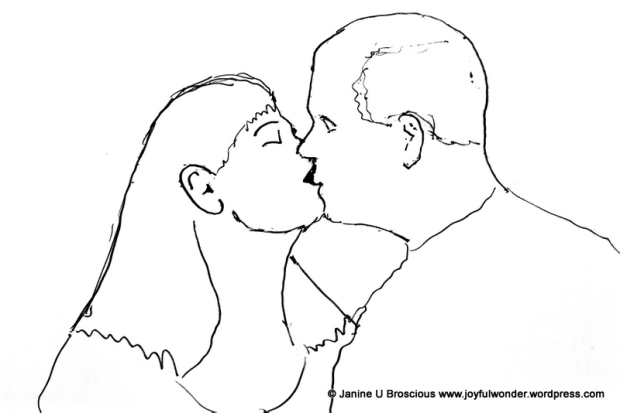
I got the faces to this point and was about to let them be, but I wanted their eyes closed. Plus, the man still didn’t seem like my husband yet.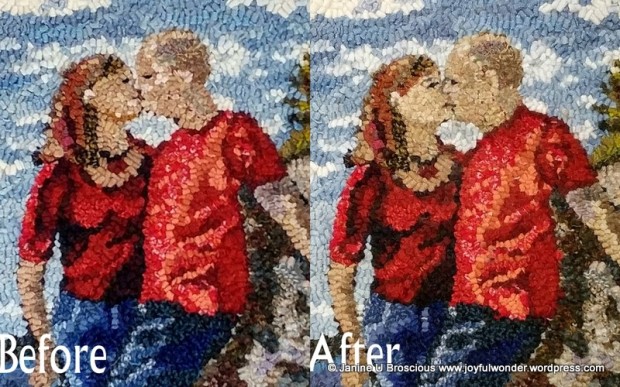
So, I worked on them some more. I got their eyes closed! And suddenly, that man I was kissing became my dear husband.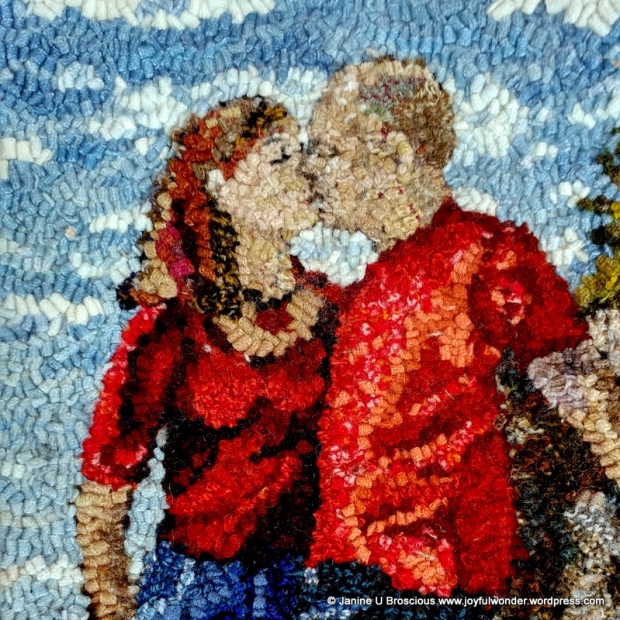
I thought it would be fun to see the progression of the faces so I came up with this collage. It is tempting to look at a finished piece and think that it happened quickly and easily. Not so with these faces. They were quite challenging for me and I almost gave up on them. I’m so glad I didn’t!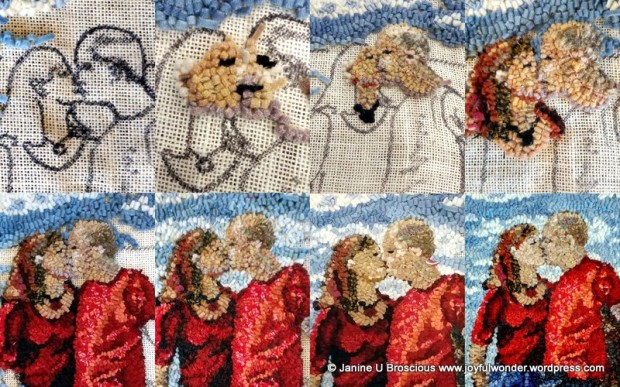
Now it was time to finish the piece. I thought about framing it. But I want to hang it in our RV and don’t want extra weight. So, I whipped the edge as I usually do.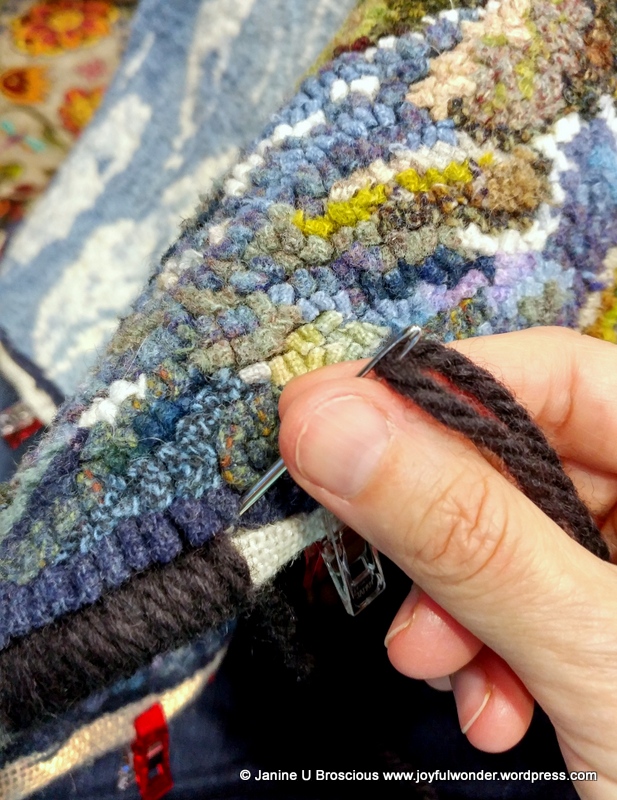
Here it is partially whipped. I love using those quilt binding clips. 
So excited as I rounded the last corner!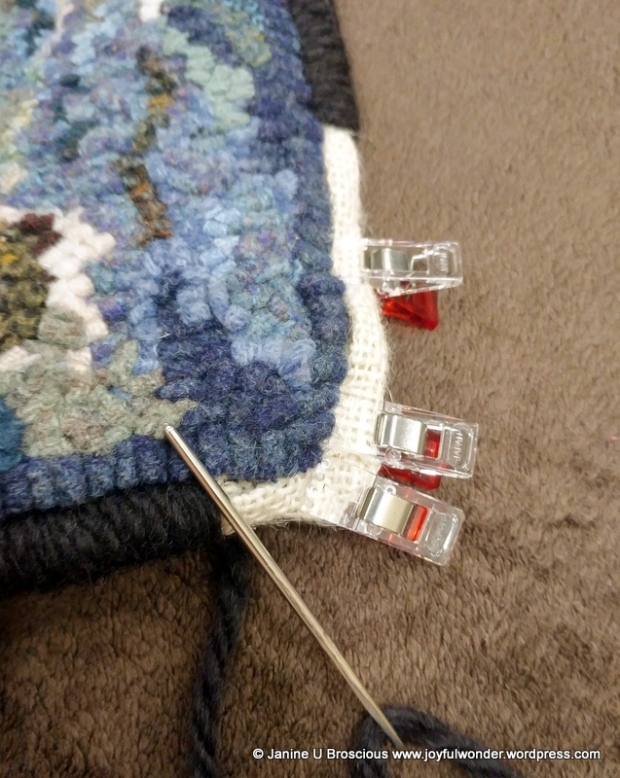
I make a label for the back of each of my hand made pieces. I hope it will last a long time and that this will help people remember why I made it.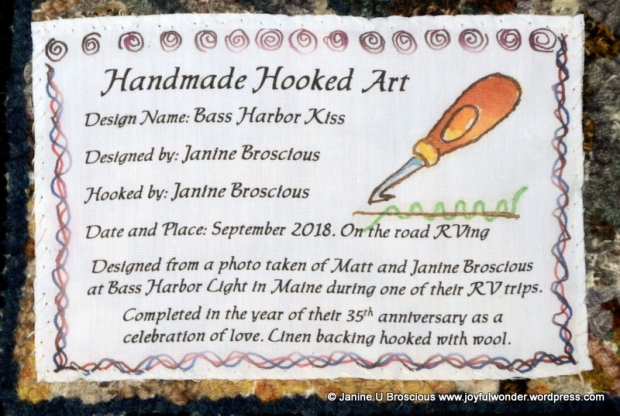
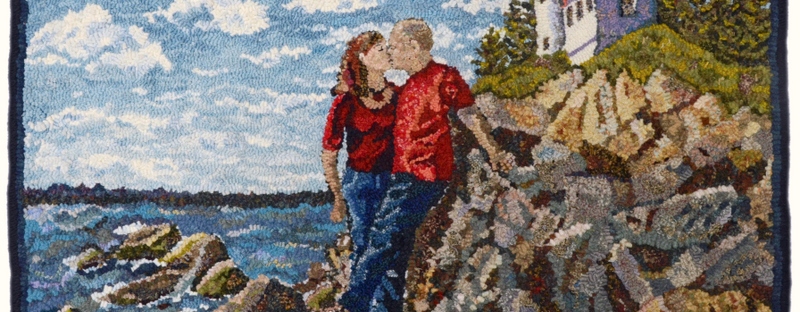
And finally, here is the completed “Bass Harbor Kiss”! What a joy this project was to do and how precious to memorialize not just our amazing adventures but also our love.
Thanks for enjoying the process with me! On to the next project!
Please leave a comment!

I have really enjoyed watching this rug come to life, it is great seeing your progress and your explanation on how you did each step.
I’m so glad you enjoyed it! It was a great learning experience!
Very well done indeed. It takes a great deal of concentration to work like this from a photo and you have achieved triumphantly!
Thank you so much!! I’m still amazed I actually finished it!
Janine,,, its spectacular!
What a beautiful labour if love,,,
Love all the pics and notes on ur progress,,,
Wow,, its worth the wait!
Bet matt loves it, too!!
Congratulations, ,,,,
Thank you, Elaine! A labor of love for such and lots of learning. Can’t wait to hang it in our RV!
What a beautiful rug and story to go with it! Amazing job! Glad you stuck with it. Thanks for sharing. Enjoyed seeing the pics along the way.
Thank you so much, Deb! This was a challenging one for sure and I almost gave up. But I’m glad Matt kept encouraging me to keep going!
What a beautiful work!! loved al the steps. How did you make that Label?
Thank you, Manju! Thanks for reading the blog post! I make the label by printing it on printable fabric in my inkject printer. So, first I had painted the hook and border, loaded a photo of that into my computer, designed the label and then printed it out.
Incredible! I have no words. Your patience and attention to detail are enviable! Thank you so much for sharing. Happy Camping!
>
Thank you so much!! It was a labor of love! Happy travels to you too!
Every time I looked at your progress on this piece I thought of my Grandmother who did rug hooking. She was very much ahead of her time and did many crafty things including artistic quilt pictures. Something that was rarely seen so many years ago. I’ve enjoyed reading your process and watching your progress. You should be very, very proud. Can’t wait to run into you next time your “home”, maybe at BLGE.
Thank you for your lovely comment, Susan! I love thinking that my work reminded you of your grandmother. ❤ It sounds like she was an inspiring lady!
You did an amazing job! I’ve been following you on FB with it.
Well done!
I hope to be able to do a pictorial rug one of these days!
diane @ “http://www.augcott.blogspot.com”>thoughts&shots
Thank you, Diane! Sometimes we just need to jump in and give it a go, right? Thanks for enjoying the process with me!
What a beautiful piece of love! Thank you too for sharing the steps on how you did this rug: your feelings of being overwhelmed, hooking one rock at a time, reworking the faces, designing it by bringing the two of you and the lighthouse forward, etc. I am so very impressed. You did an outstanding job!
Jaynie, thank you for such a lovely comment! This really was a labor of love. And even though it was quite challenging, it was rewarding too. Thank your for enjoying it with me!
Your writing has turned this rug hooking project into a real adventure. I liked every second of the read and moved on with excitement to see how you resolved each step. This should be published, the photos are delightful. How will you top this one?
Thank you for your lovely comment! It really was an adventure and I wonder, too, what I will do next. But there is always so much to learn about art! I’m sure I’ll find something!
Janine, the love story is a big part of the story. However, the work and study to achieve the story in your “fibre art piece” is extremely well done. You have illuminated various sections of your work in depth to assist others. Must be the teacher in you. 👍🏻
The process always or usually needs thought and correction… a learned experience in a lovely art form.
Thanks Anne
Anne, thank you so much for your comment and all your encouragement! I guess maybe there was a bit of the teacher in me coming out. I love the idea of inspiring someone else to try this art form.
Love seeing you describe how you achieved this! So glad you took all the photos in different stages, it’s so helpful! Good information to know about those books you used for reference too! Thanks. You are an amazing artist!
It was such a joy to create this hooked art piece! Thank you for your lovely comment. Yes, the books are very helpful! God bless!
Thank you for sharing your process!
Thanks for reading the blog and commenting. I’m glad you enjoyed it!